
3 Keys to Avoid Cycling Knee Pain: “Spring Knee” series part 1
“When my legs hurt, I say: ‘Shut up legs! Do what I tell you to do!’” — Jens Voit
The point: Mr. Voit never mentioned “shut up anterior knee pain!”. So before you break out the fingerless gloves this year, refine and master these 3 movements to help ensure a spring, year, and lifetime of pain free pedaling.
The gist: “Transition to awareness” – moving well during sport-specific, off-bike exercise(s), then applying those movement patterns on the bike with intent, purpose and understanding. Any exercise that doesn’t translate well to a sport is just an “ornamental movement” – good for social media click bait or on the dance floor, but that’s about it.
A simple 3 step series to better movement patterns off and on the bike:
1. “Find” your hips.
How this translates to cycling:
Most cyclists can not differentiate their gluteal muscles from their low back, hip flexors or facial muscles for that matter. The ability to “find” and engage your gluteal muscles will spread the pedaling force over a larger range of muscles leading to more power or, for bike trailer-pulling parents, simply less effort.


Mental focus points:
Main Takeaway:
If yes to any of these then good news, you are a normal human due to our inherent asymmetry. What is of greater importance is the delta, or amount of side to side difference.
Nuances for success – start with a solid base:
- Ground your feet with equal contact between the ball of great toe, ball of pinky toe and your heel while maintaining awareness for the space under the arch of each foot. Knees remain stationary, locked out or slightly bent.
- Squeeze glute muscle on side to be weight bearing at a mild to moderate intensity without tilting pelvis or arching low back
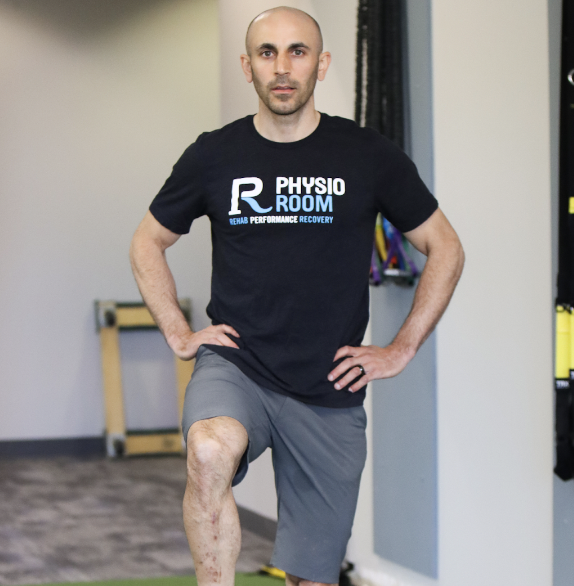
- Slooooowly unweight one leg and bring the knee up (as shown)
- “Tuck” or stack your hip so it doesn’t pop out to the side (indicated in picture)
- Hold for 4 breaths at a normal rate and depth
Connect with Physio Room:
Find Us On Our Socials
Website
Instagram
Facebook